How to create a Lesson using the Memory Game Component?
Using this simple yet beautiful component, you can create your own memory game and test the memory of your site users or students.
When to use this Component
Memory games can be used to test the memory of your site users. You can add pictures related to the lesson and let the users play this game, which will make them understand the lessons better.
How it works
-
The descriptions are given on the top of the page.
-
Click on each card to flip it and reveal the picture on the other side. When you click on two similar images continuously, they will remain turned and you can explore other cards.
-
If user does not click on the similar cards continuously, the card will turn back to hide the pictures again.
-
Time is being calculated while the user is playing the game. The game ends when the user has revealed all the cards.
-
Once the game is finished, a simple feedback appears commenting about the user’s play.
-
A summary showing the time spent and the number of card turns is shown at the bottom of the page.
Features of this Component
-
This is one of the most interactive and creative components in the Responsive E-learning components.
-
Everybody, including children would love to play this game.
-
The title, Description Right and Description for the image fields are optional.
-
You can add as many images for a page.
-
The images are duplicated automatically.
You can create a page using this component by following the below steps.
Step 1: Go to the required Slide
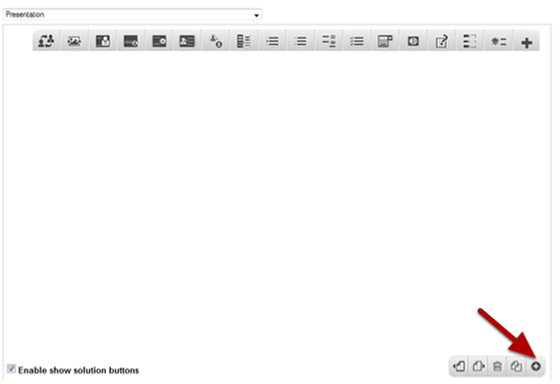
If you are creating a new Presentation, you will be taken to the first slide where you can use this component and create a page. Alternatively, if you want to add a new slide where you want to use this component, click on the '+' icon on the lower right corner as shown in the above image.
Step 2: Click on the Memory Game Component Icon

Click on the More elements [1] icon then click on the Memory Game [2] Component icon as shown in the above image. You will see a screen similar to the image shown below.
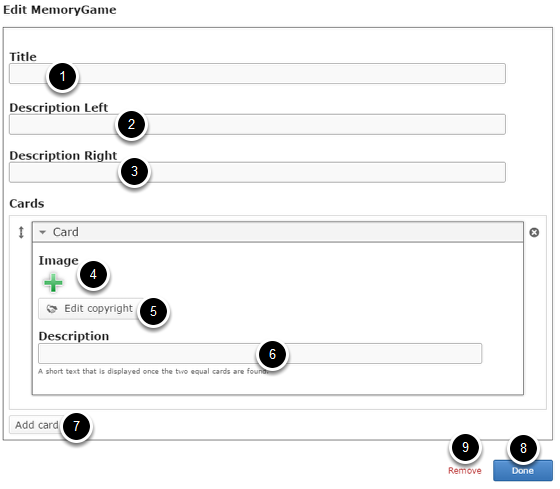
On this screen, you can
-
Add the title on the Title [1] field.
-
Add descriptions on the Description Left [2] and Description Right [3] fields.
-
Add an image for the card using the ‘+’ icon under Image [4] title and update its copyright details by clicking the Edit copyright [5] button.
-
Add Description text about the image in Description [6] field.
-
Add more cards by clicking on the Add card [7] button.
-
Click on the Done [8] button to save the changes.
-
Remove the component by clicking the Remove [9] button.
Step 3: Add a Title (Optional)
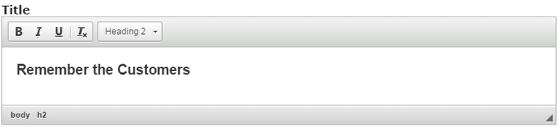
Type the title of the page on the Title field as shown in the above image. You can also change the format of the title. This field is not mandatory, and if you don't enter a title, it won't be shown as an empty space on the page. This field is not mandatory.
Step 4: Add Description Left
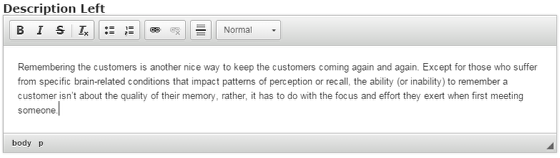
Just type the contents of the page in the Description Left field as shown in the above image. You can also change the format of the text, add and remove hyperlinks and insert horizontal lines between the contents. This field is mandatory and must have some text in it.
Step 5: Add Description Right (Optional)
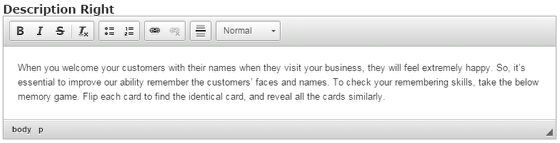
Similarly, you can add contents to the Description Right field as shown in the above image. You can also change the format of the text, add and remove hyperlinks and insert horizontal lines between the contents. Please note that this field is not mandatory as well.
Step 6: Add an Image
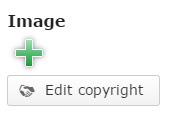
You can add an optional image for the card by clicking the '+' icon under Image title as shown in the above image. You can choose an image file as shown in the below image.
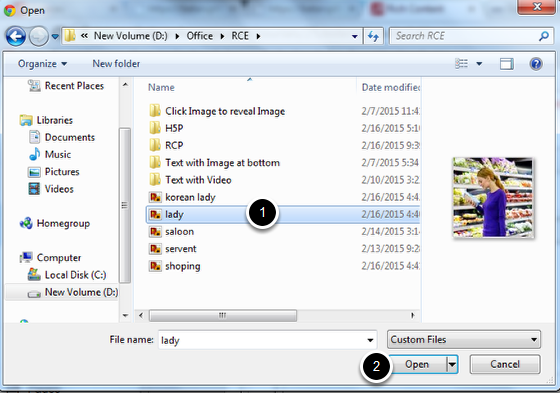
On the above screen, go to the required folder, select the required image [1] and click the Open [2] button. You can see image being uploaded as shown in the below image.
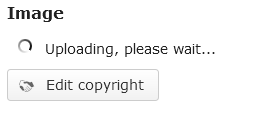
You can see image being uploaded as shown in the above image.
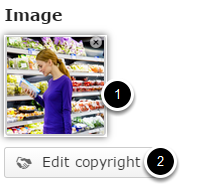
Once the image has been uploaded, it will be shown under the Image title as shown [1] in the above image. Optionally, you can update the copyright details of the uploaded image by clicking the Edit copyright [2] button shown above. Once you click the button, you will see the below screen.

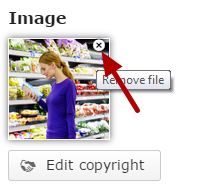
You can enter the image's copyright details on the above screen and click the Close button to update it. You can remove the uploaded image by clicking on the Remove file button shown on the below image.
You will be prompted to remove the image as shown in the below image. Click OK to confirm and remove the image.

You can also update the image without removing it by clicking on the image. You will be offered to select the image again as mentioned in step 6 for other cards.
Step 7: Update Description (Optional)

You can give the description about the image in the Description field. This description will be displayed when user has clicked on two similar images continuously and the cards remain revealed. Please note that this field is Optional.
Step 8: Add more Cards
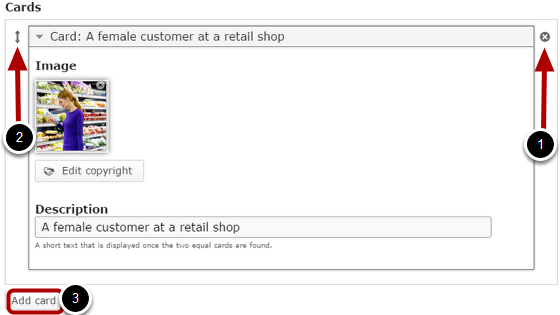
By default, there is only one card available at the beginning. If you want to add another one, click the Add Card [3] button as shown in the above image. Another card will be added after you click the Add card button. You can remove any card by clicking the X [1] button on the top right corner of the card window. You can also change the order of the cards by dragging the Double Headed Arrow [2] button on the top left corner of the card window. Similarly, you can add as many cards as you want.
Step 9: Click the Done Button

Once you've updated all the details, click the Done [1] button shown above to complete editing the page. You can cancel creating the page just by clicking the Remove [2] button shown above. If you click the Done button, you will see the below screen with a preview of the created page.
Step 10: Click the Create Button

If you still want to edit the page, just double click on the preview page, and you will be taken to the Edit page. If you've done all the changes, you can click the Create button as shown above picture to finish editing the page.
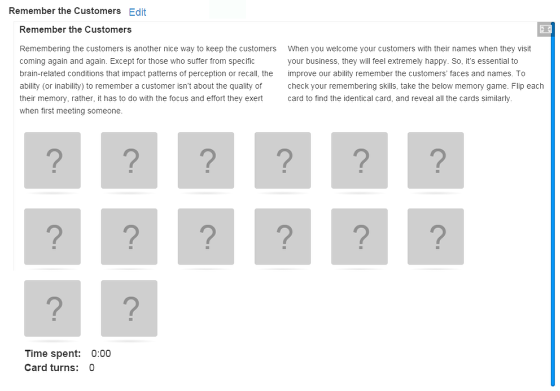
You can see the finished page as shown in the above image.
Notes
-
You can create as many pages as possible in a Presentation using this component.
-
You can create as many cards as you need in a page using this component. You can upload images only in .jpg, .png and .gif formats only.
-
You can upload landscape and portrait pictures.